

Supplies:
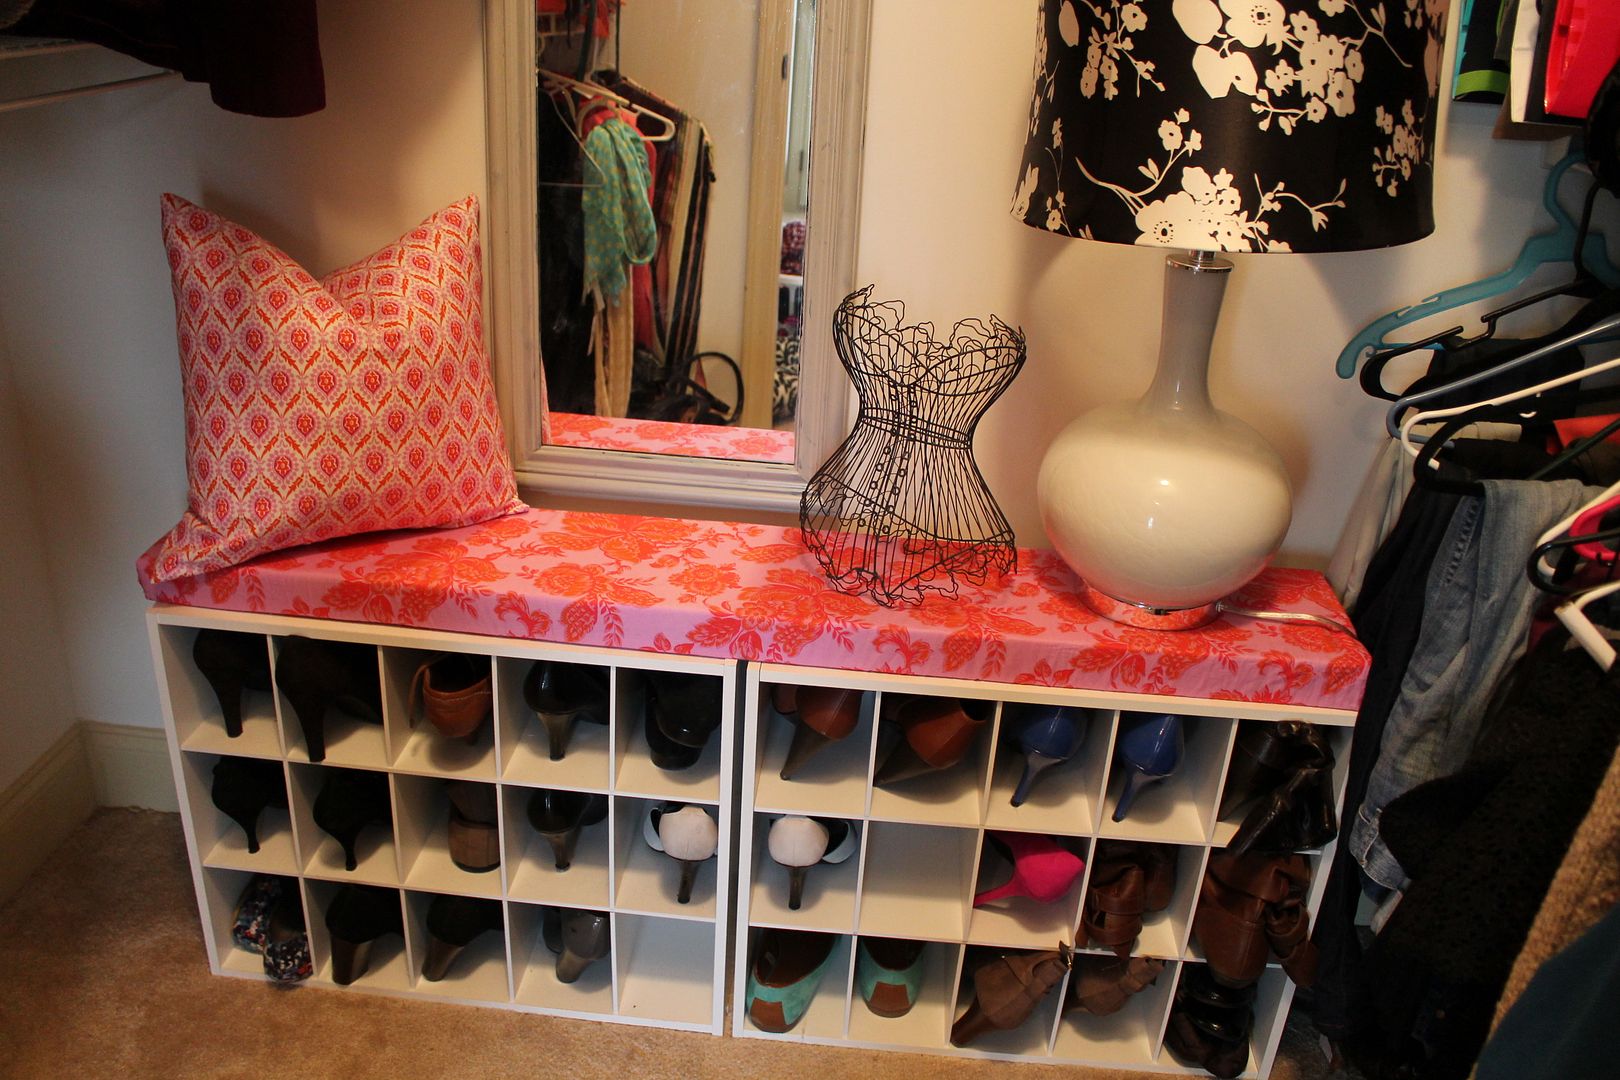
1. Bench: If you are making a shoe bench cushion cover, I bought my 2 shoe holders from Target here.
2. Foam: This can be found at Hancock or other sewing/hobby stores. I used 2" deep foam.
3. Fabric: I used less than 1 yard since my fabric was wider than the width of the cushion.
4. Notions: of course you'll need a ruler, pins, hand sewing needle, thread, fabric marker, scissors, etc. I recommend this water soluble fabric marker you see below--you mark your fabric and then it disappears in water!
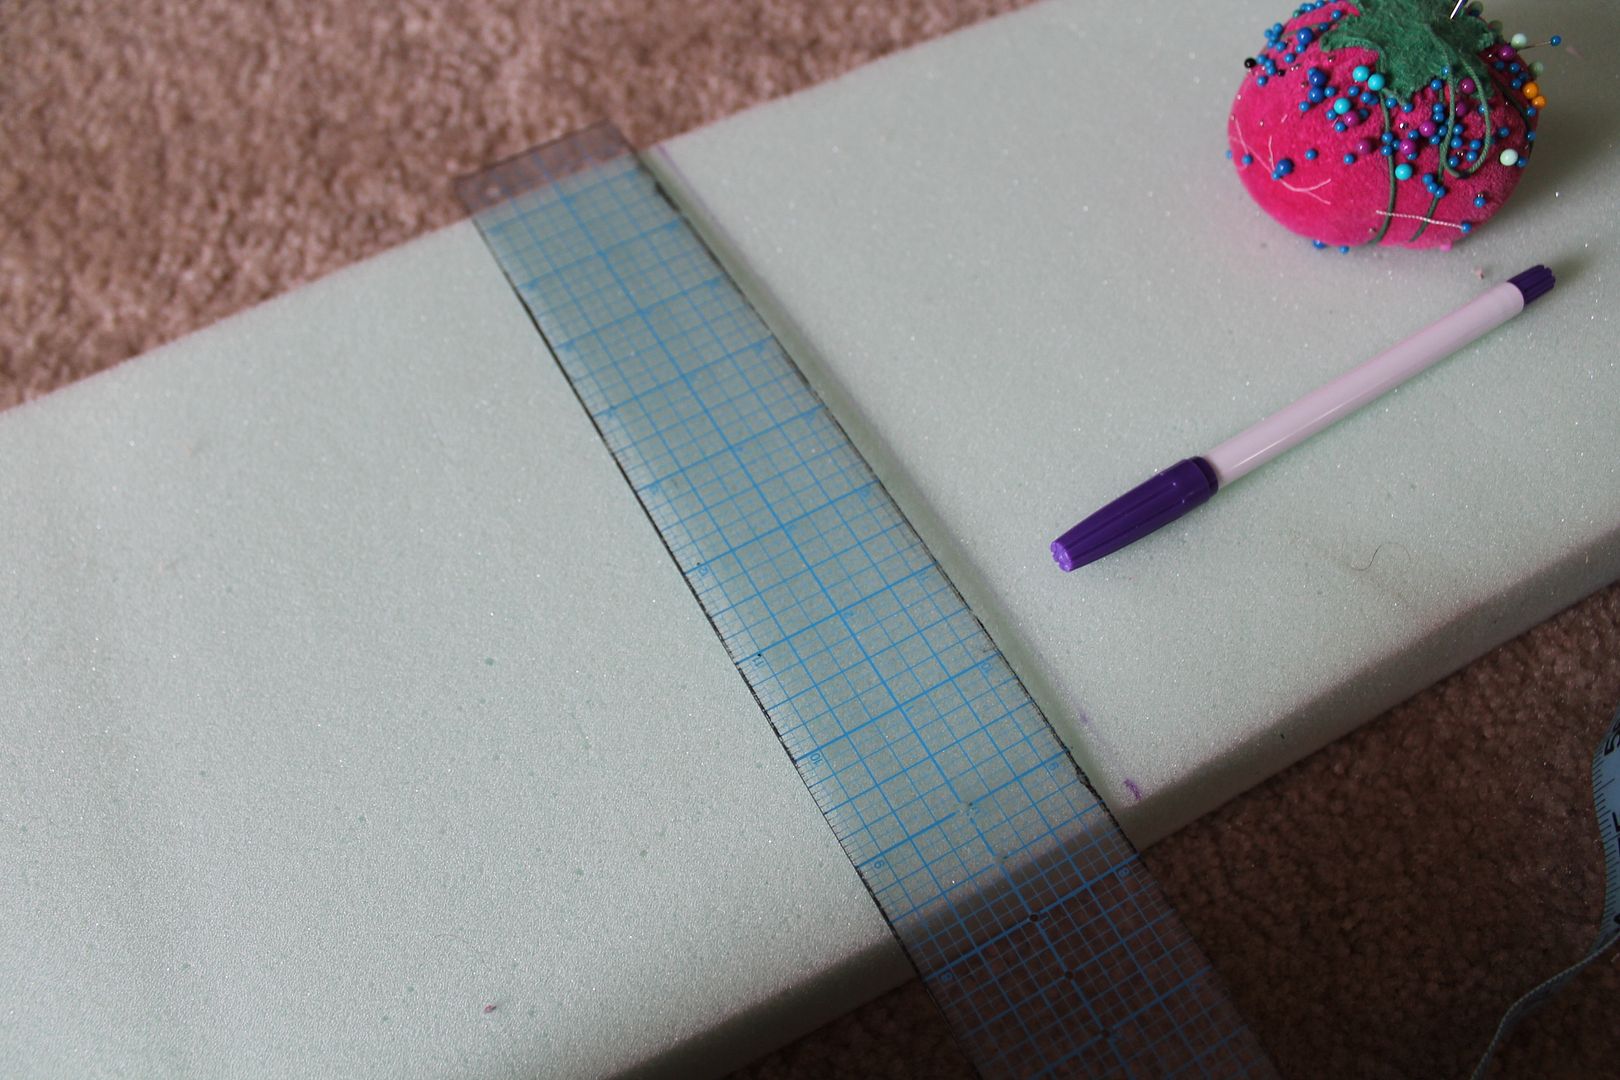
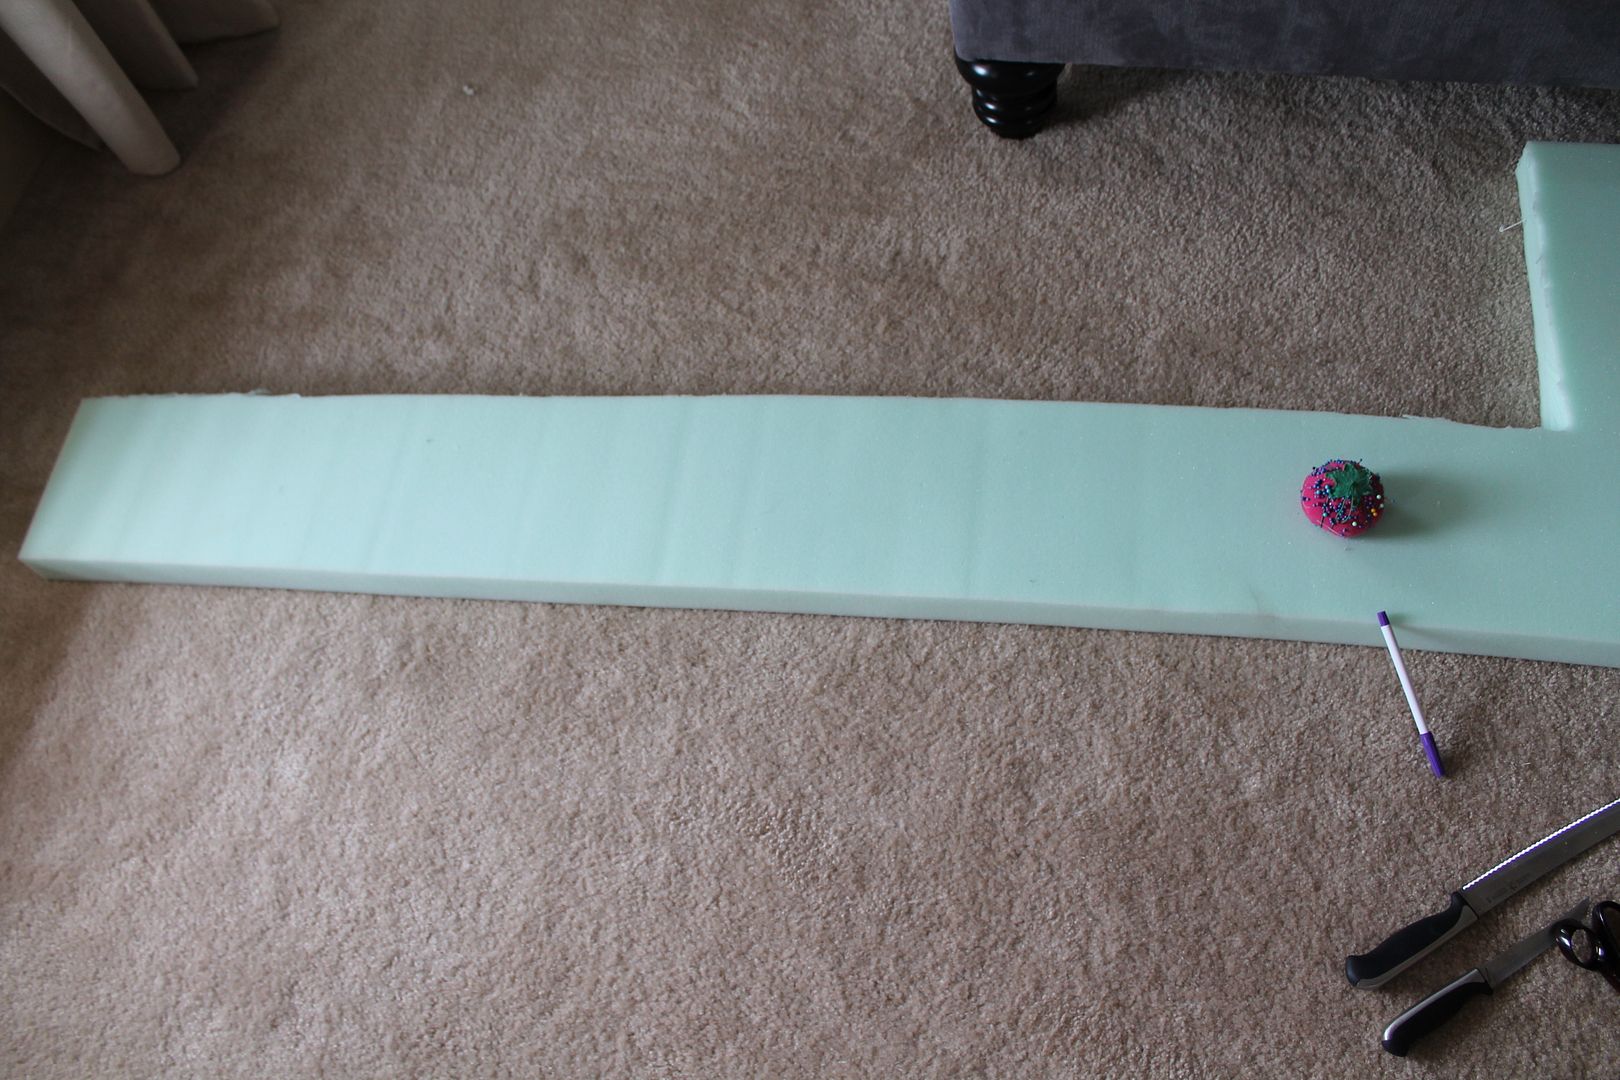
Step 1: Measure your bench and cut your foam to size. I recommend a sharp knife and a husband for this (I hate knives). In my case this was the 2 benches together that equaled 48" long and 11" wide.
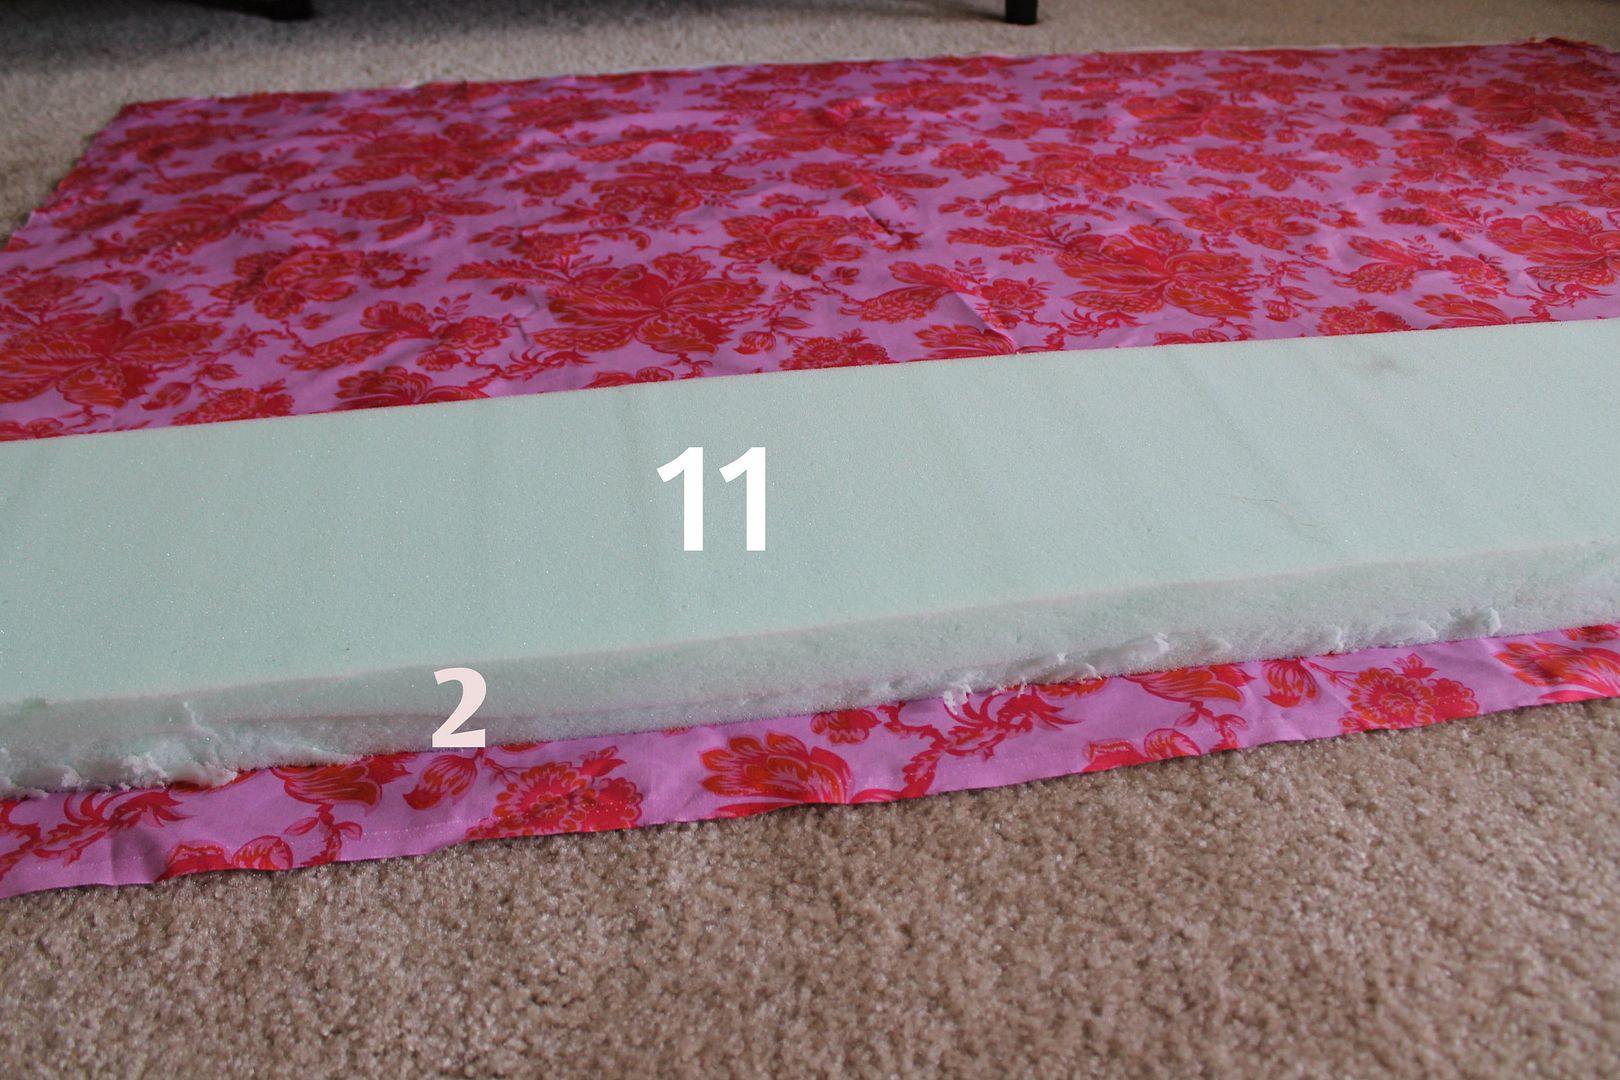
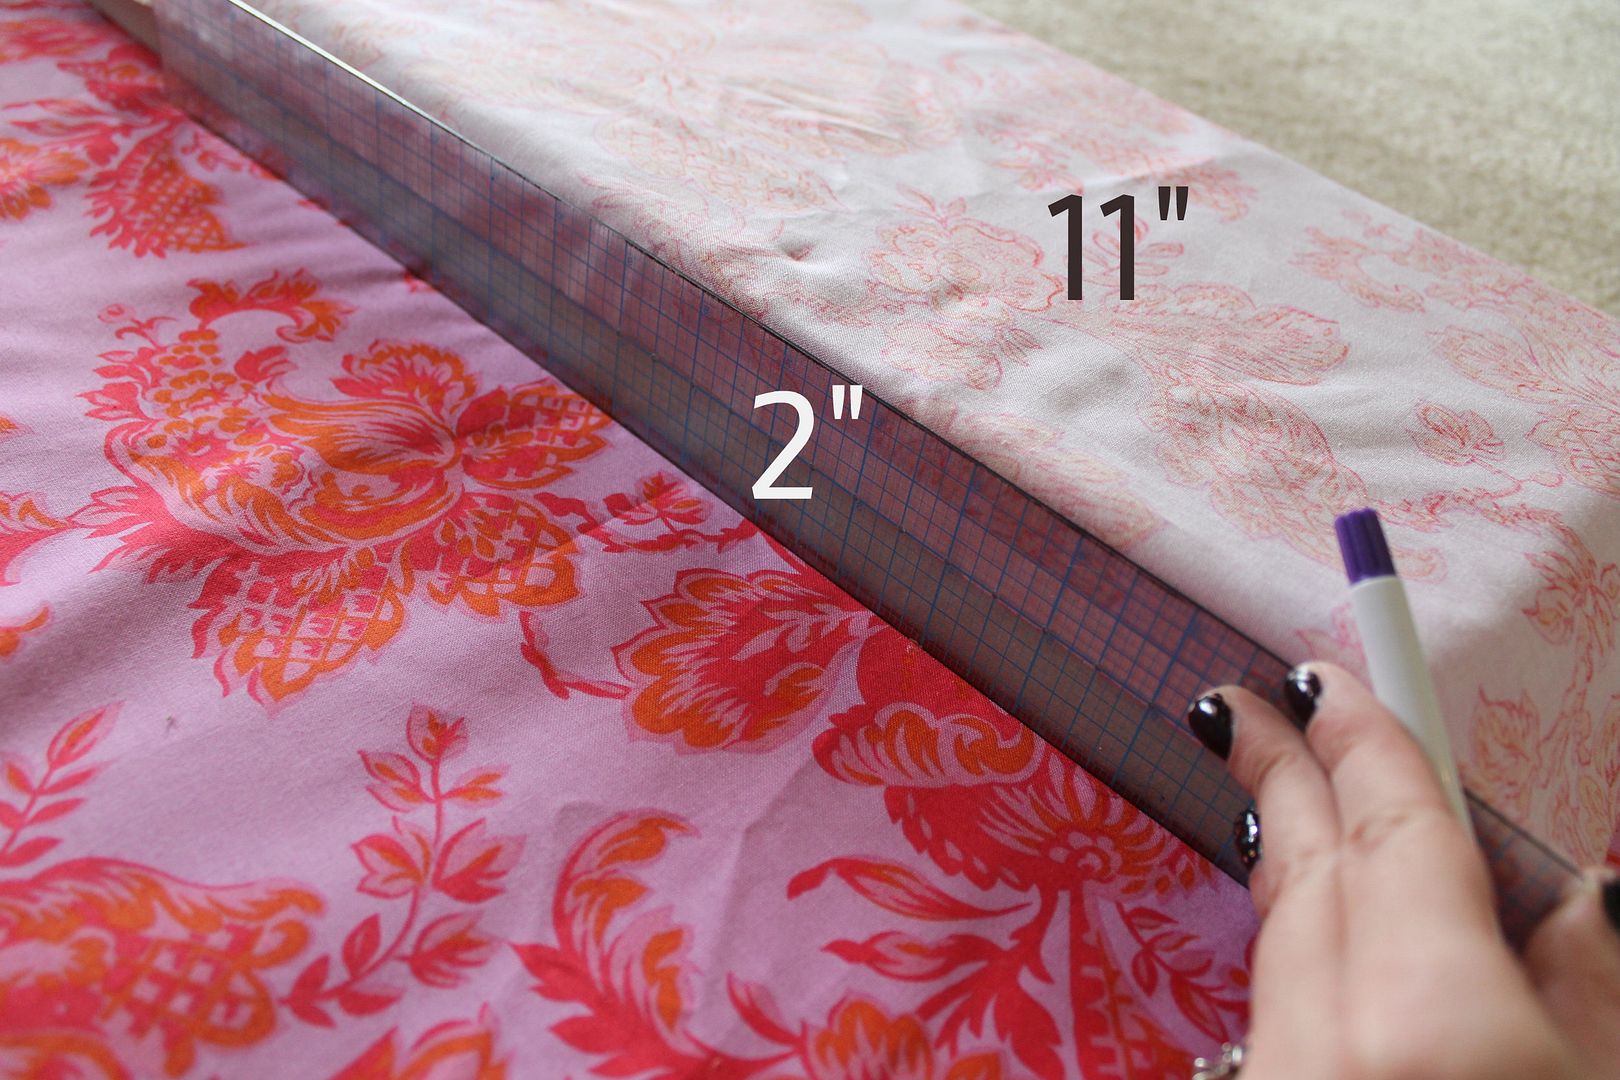
Step 2: Ok guys, I know I didn't mention before but there is a little math involved. Don't worry, it's simple addition. You can do it!! We are only cutting out 1 rectangle here!!! My foam was 48" long and 2" deep so I needed to cut 48"+2"+2"+1"+1" seam allowance=54" Then I measured my width and depth and doubled it: 11" wide+ 2" deep +11" wide +2" deep+ 1/2" seam allowance +1/2" seam allowance=27" So, I cut out 1 55" x 27" rectangle.

Step 3: Fold your rectangle in half hot dog style (Remember that?). So fold the 27" wide side in half. You'll have a 55" x 13 1/2" rectangle now. Fold it so that the "face" side touches "face" side. Pin it and sew it with 1/2" seam allowance. Leave one short end unsewn!
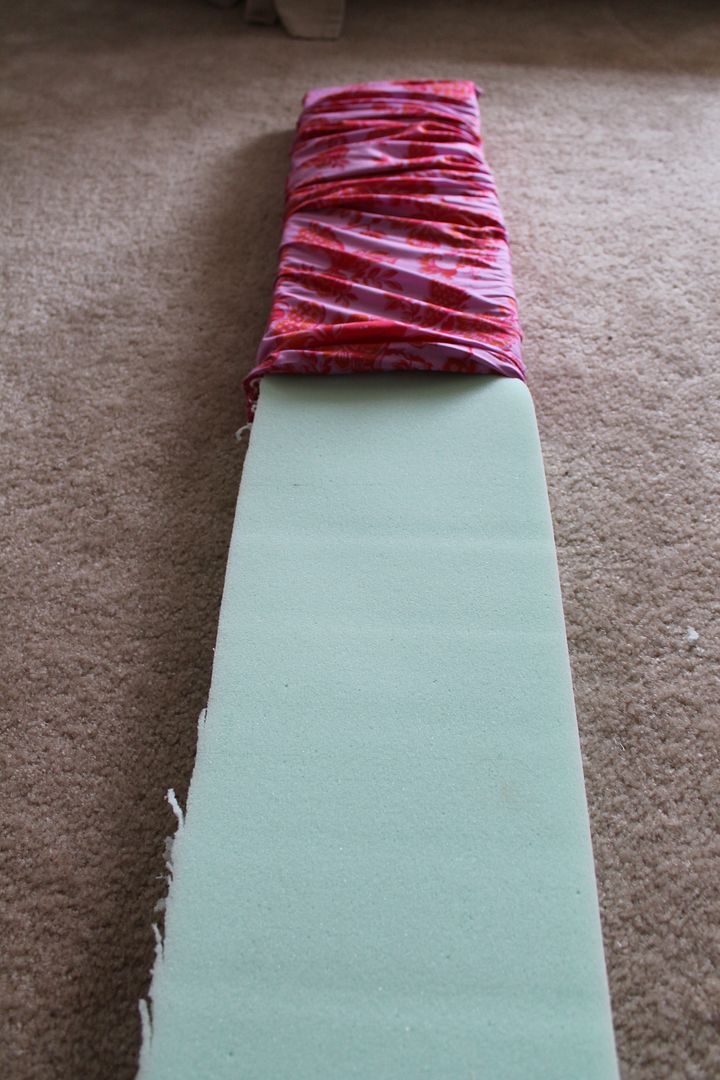
Step 4: You've just sewn a tube! Turn it right side out. Now this parts kinda tough because foam is not slippery! Stuff that foam into your fabric. Push it in as far and tight as you can. Make sure your seam is to the back (on the 2" deep side).
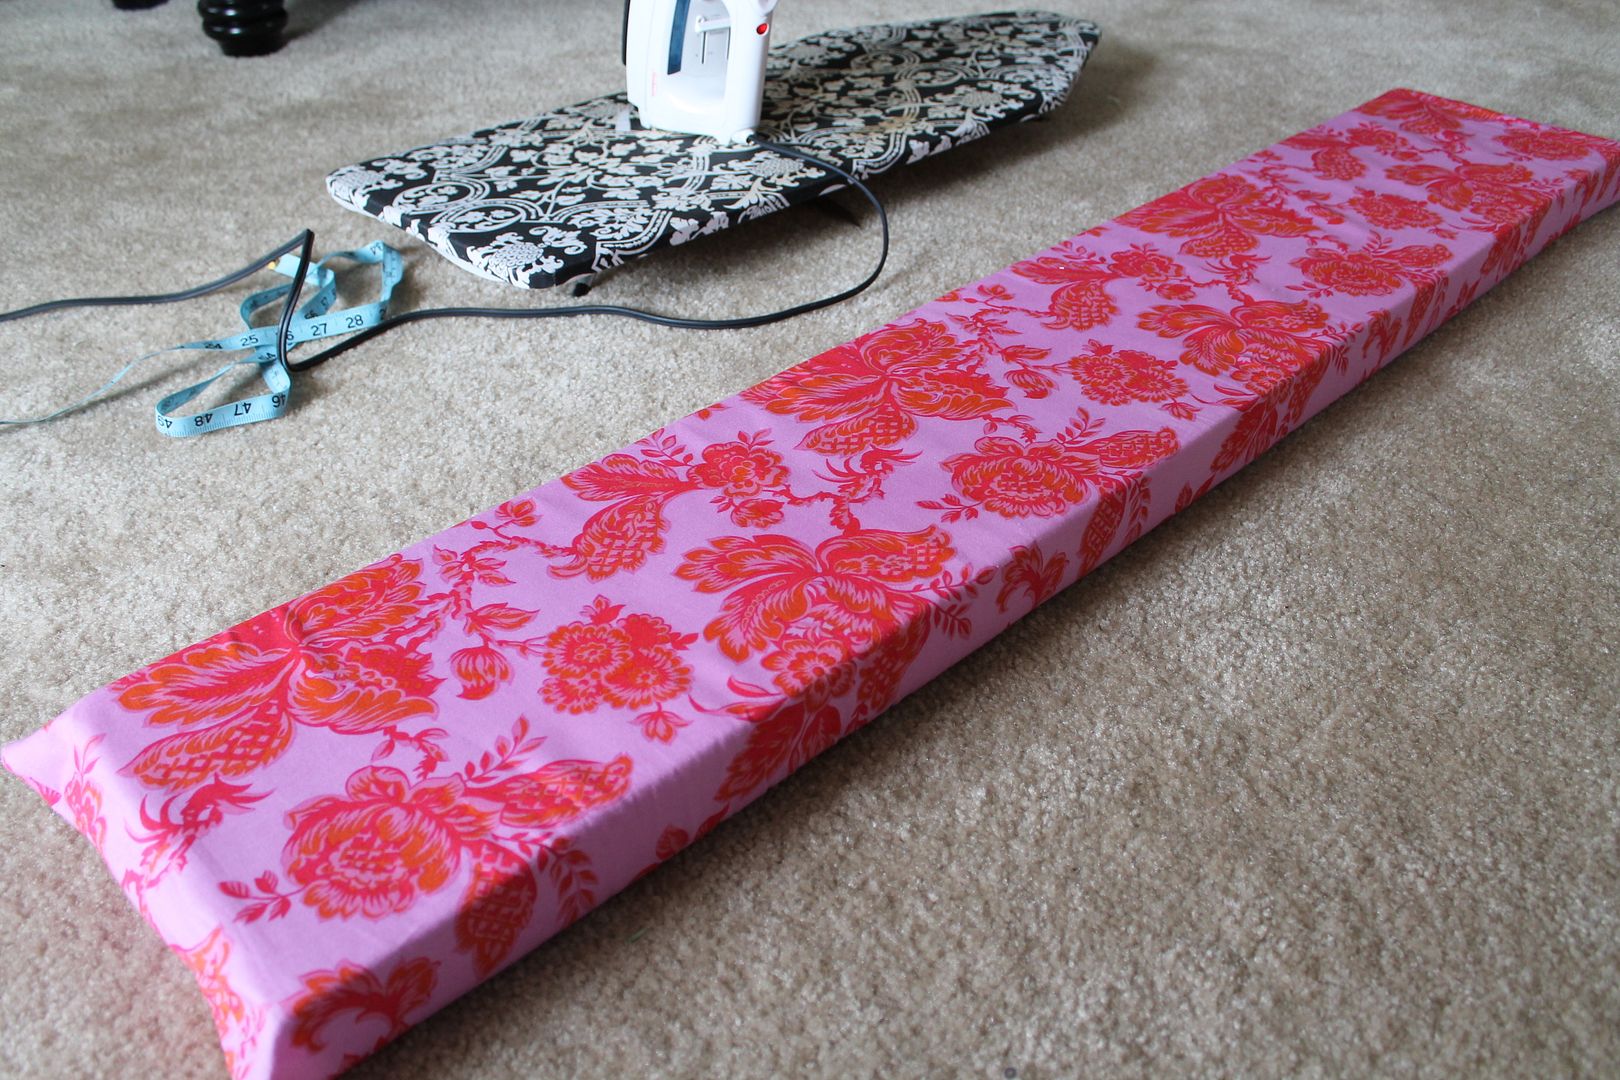
Step 5: After all that squishing, my fabric was wrinkled again so I just ironed my cusion, foam and all. No prob.

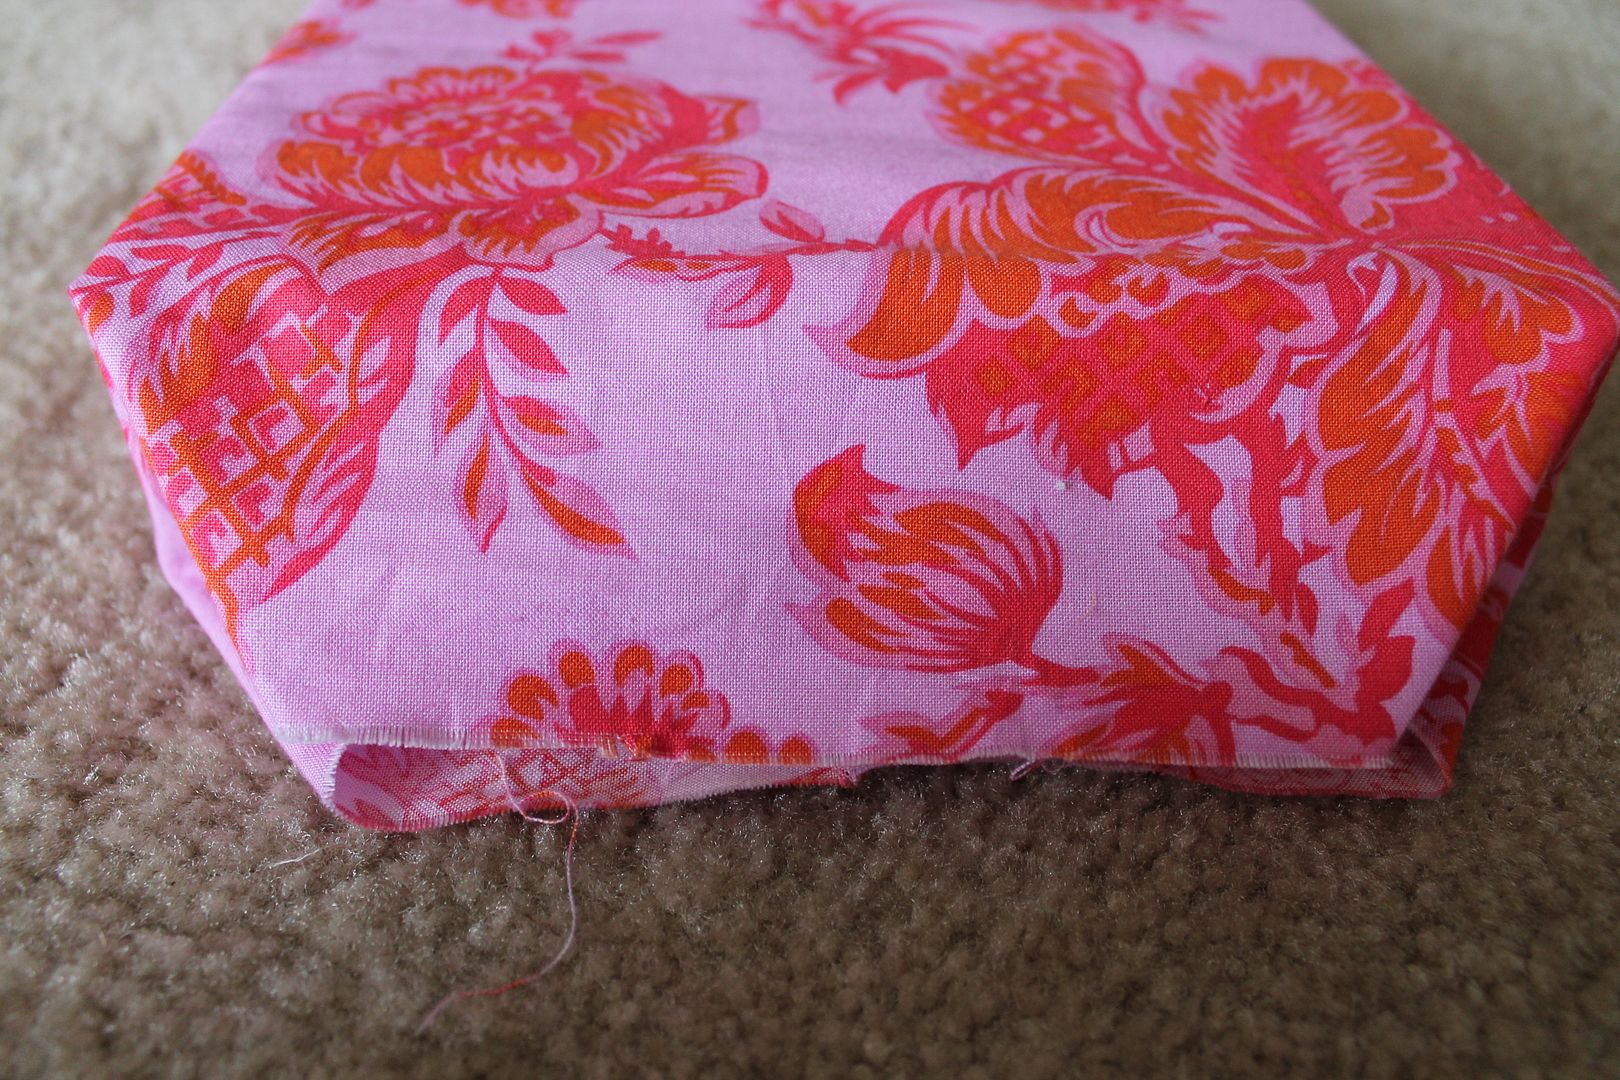
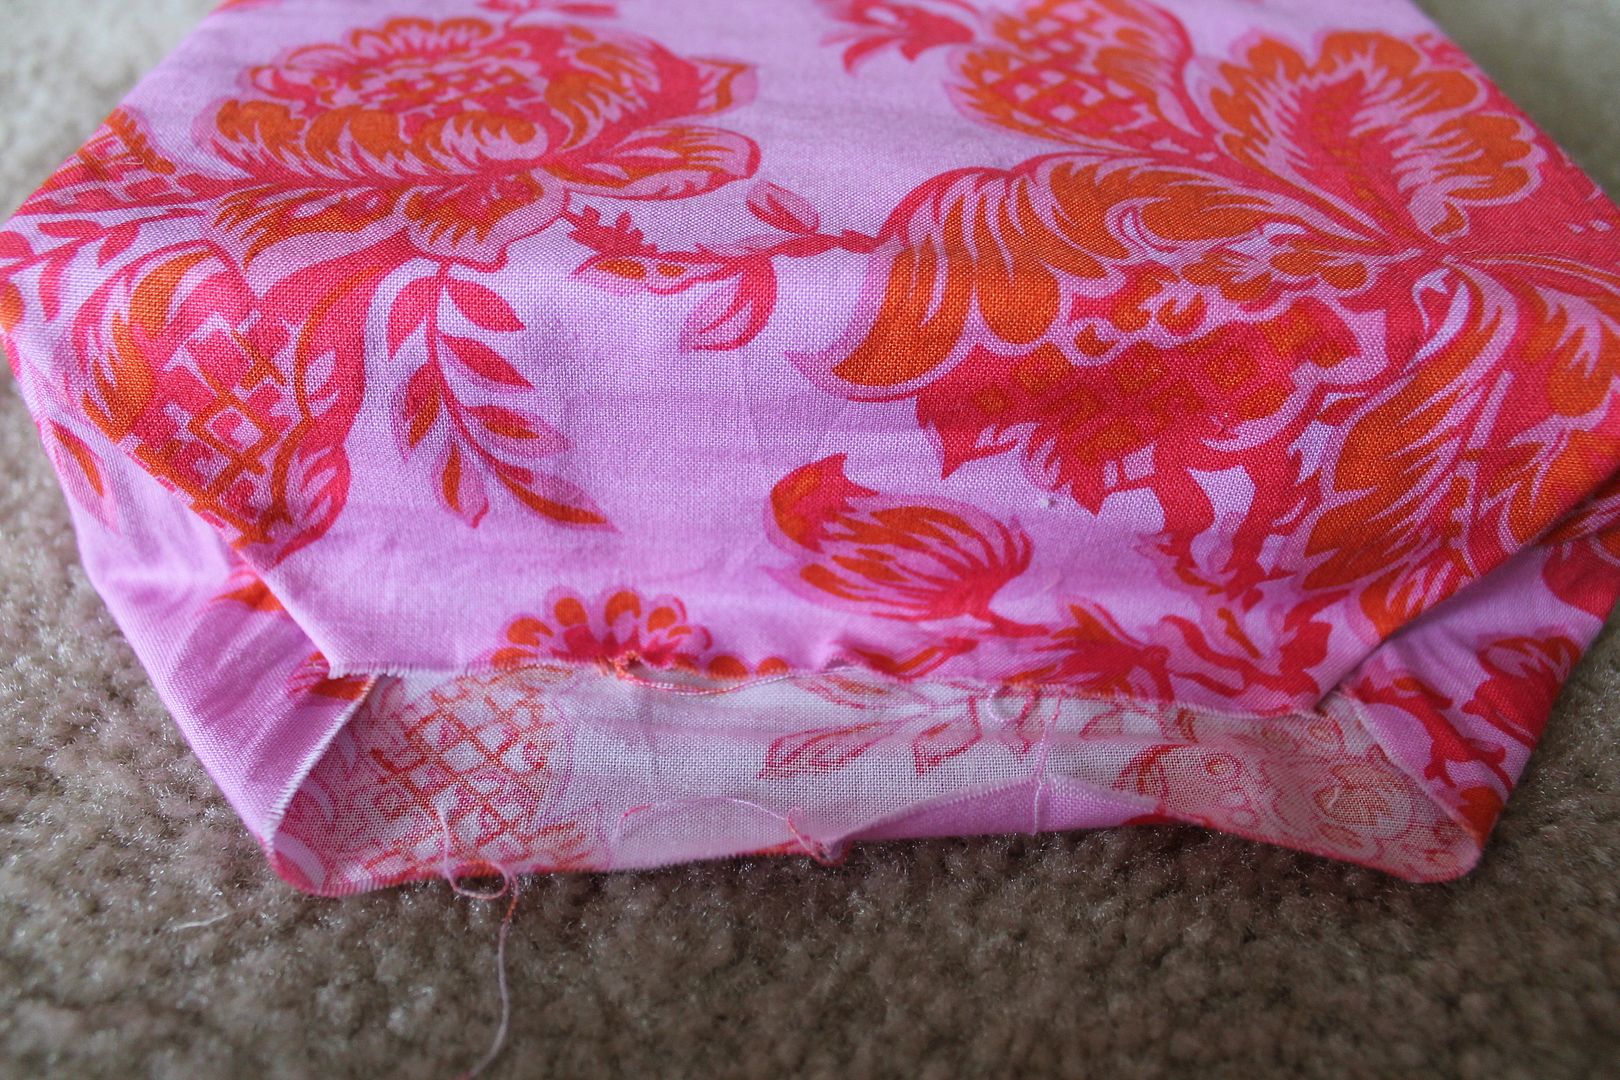
Step 6: Ok, now see how the corners poke out like ugly ears?

Just poke them in. That's better, right?

Now just do a couple of hand stitches along the fold to hold those "ears" in place. (Please ignore my polka-dot PJ's)
Step 7: Now for the other side (the side you didn't machine sew). You're just going to wrap it like a present. Fold in your sides then fold down the top, then fold up the bottom. That's the best way I can describe.
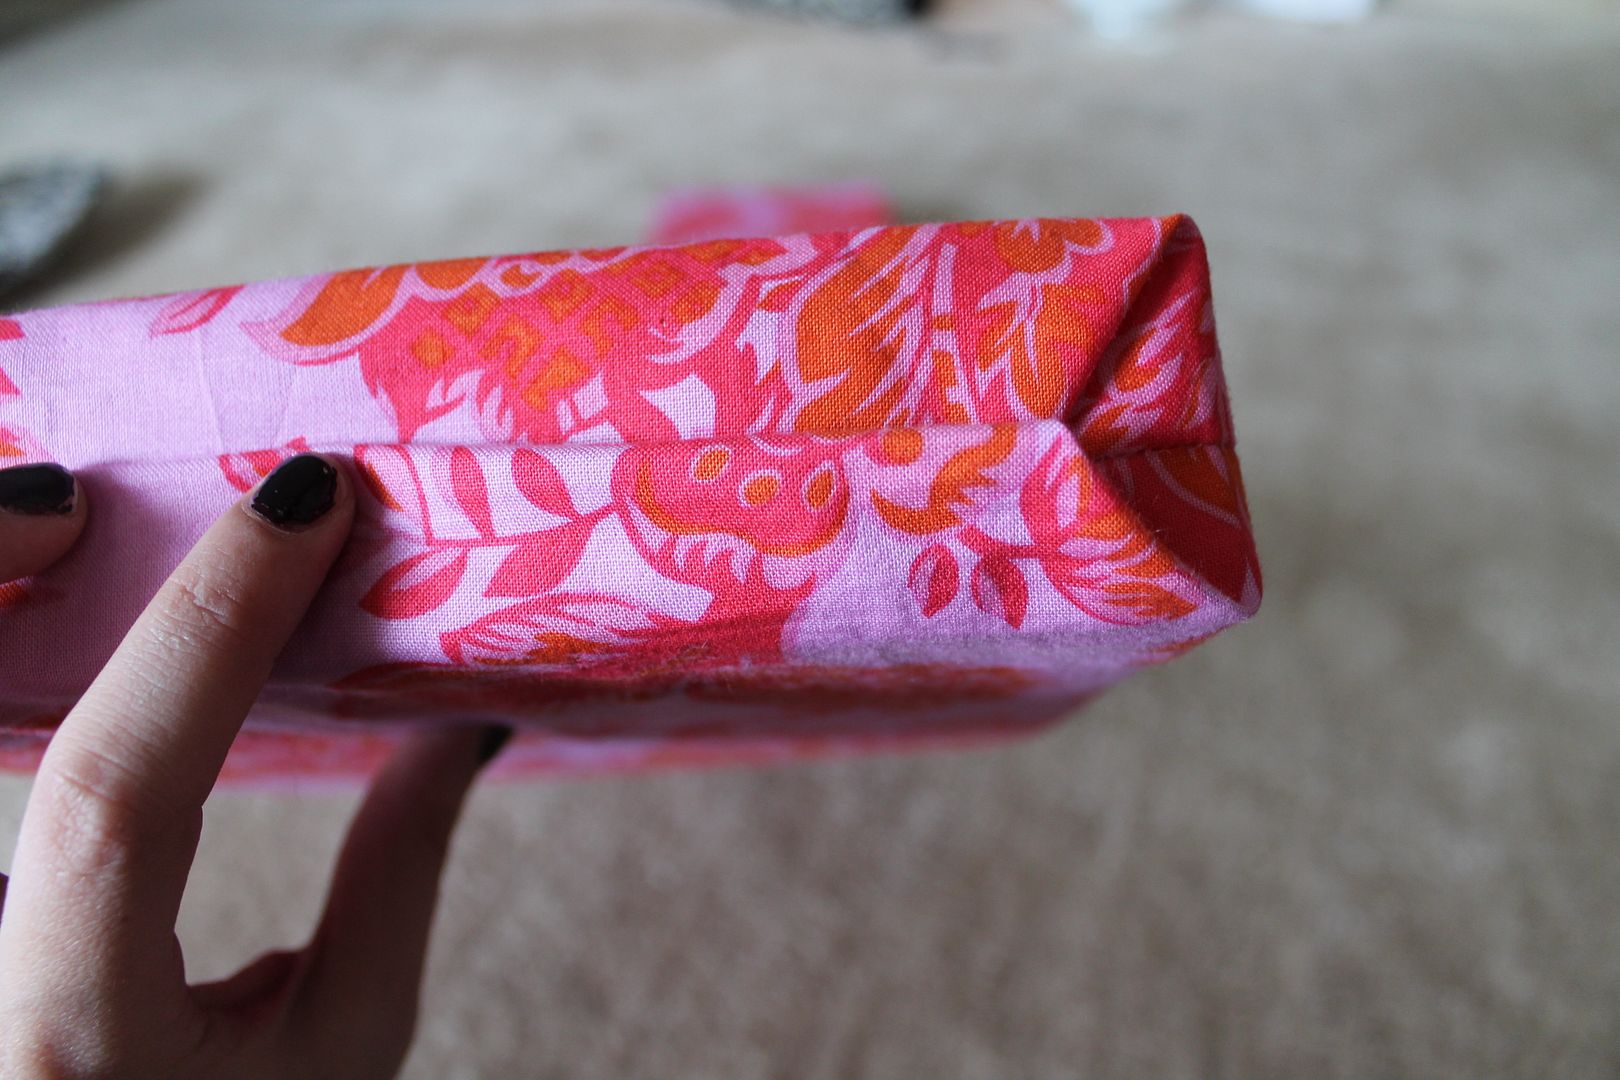
It should look like this folded. Just hand stitch along the fold.
That's it!! Any questions? Just ask! Now if you try it, be sure to send me a picture!!
Very cute idea! I have two similar shelves for my shoes and this would be a great way to add a little spunk to them. (Plus it seems easy!) Thanks for sharing!
ReplyDeleteWhere do you get the foam?
ReplyDeleteI got mine at Hancock Fabrics. Probably and fabric/craft store will have it!
DeleteI'm a major beginner when it comes to sewing, but thanks to your tutorial I've just made two cute cushions for a L-shaped bench on my patio. This totally took the intimidation out of the project!
ReplyDeleteThat's great! I'm glad it helped. Would love to see pics! :)
DeleteI am so glad I found this site! I volunteered to sew a bench cushion for our church entry, and then wondered what would be the best way to do it. When I found your site and all the great pictures, I knew it was exactly what I was looking for! Thanks so much for a great tutorial! You are a lifesaver!
ReplyDelete